
How to Sculpt with Polymer Clay: Step-by-Step Beginner's Guide
This guide teaches beginners how to sculpt with polymer clay from start to finish. If you're wondering how to sculpt with polymer clay, you're in the right place. I'm Anthony from Ace of Clay, and I've spent years creating professional polymer clay sculptures for hundreds of thousands of artists and collectors around the world. In this complete beginner's guide, I'll teach you exactly how to sculpt with polymer clay step by step using the same process I use in my own work.
If you’ve ever wanted to try sculpting, polymer clay is one of the easiest and most approachable materials to start with. Polymer clay is a soft, moldable modeling clay that stays workable until you bake it in a regular home oven. Unlike traditional clay that dries out or needs a kiln to fire it, polymer clay remains flexible while you work, giving you as much time as you need to shape and refine your sculpture.
Sculpting with polymer clay is essentially the process of forming shapes, characters, or objects using your hands and sculpting tools. Artists use it to create everything from miniature figures and fantasy creatures to jewelry, collectibles, and detailed character sculptures. Because polymer clay holds very fine detail, it’s especially popular for character design and highly textured pieces.
Before sculpting, the clay usually needs to be conditioned. This simply means kneading it in your hands until it becomes soft and smooth. Once the clay is workable, you can begin shaping it into your sculpture. Many artists start with a simple armature made from wire or aluminum foil to give the piece structure, then build the clay over top. From there, sculpting tools can be used to carve details, smooth surfaces, and add textures that bring the sculpture to life.
One of the biggest advantages of polymer clay is how forgiving it is. If you make a mistake, you can simply reshape the clay or remove a section and try again. Since it doesn’t dry out while you’re working, you can take your time refining the details without feeling rushed.
When the sculpture is finished, the clay is baked in a standard oven at the temperature recommended by the manufacturer, usually around 265–275°F. The baking process permanently hardens the clay into a durable, plastic-like material that preserves every detail you sculpted. After baking, many artists sand, paint, or seal their pieces to achieve the final look.
Whether you're creating your first simple sculpture or working on a detailed collectible figure, polymer clay makes it possible to turn ideas into physical artwork using just a few basic tools and a little creativity.
Getting Started
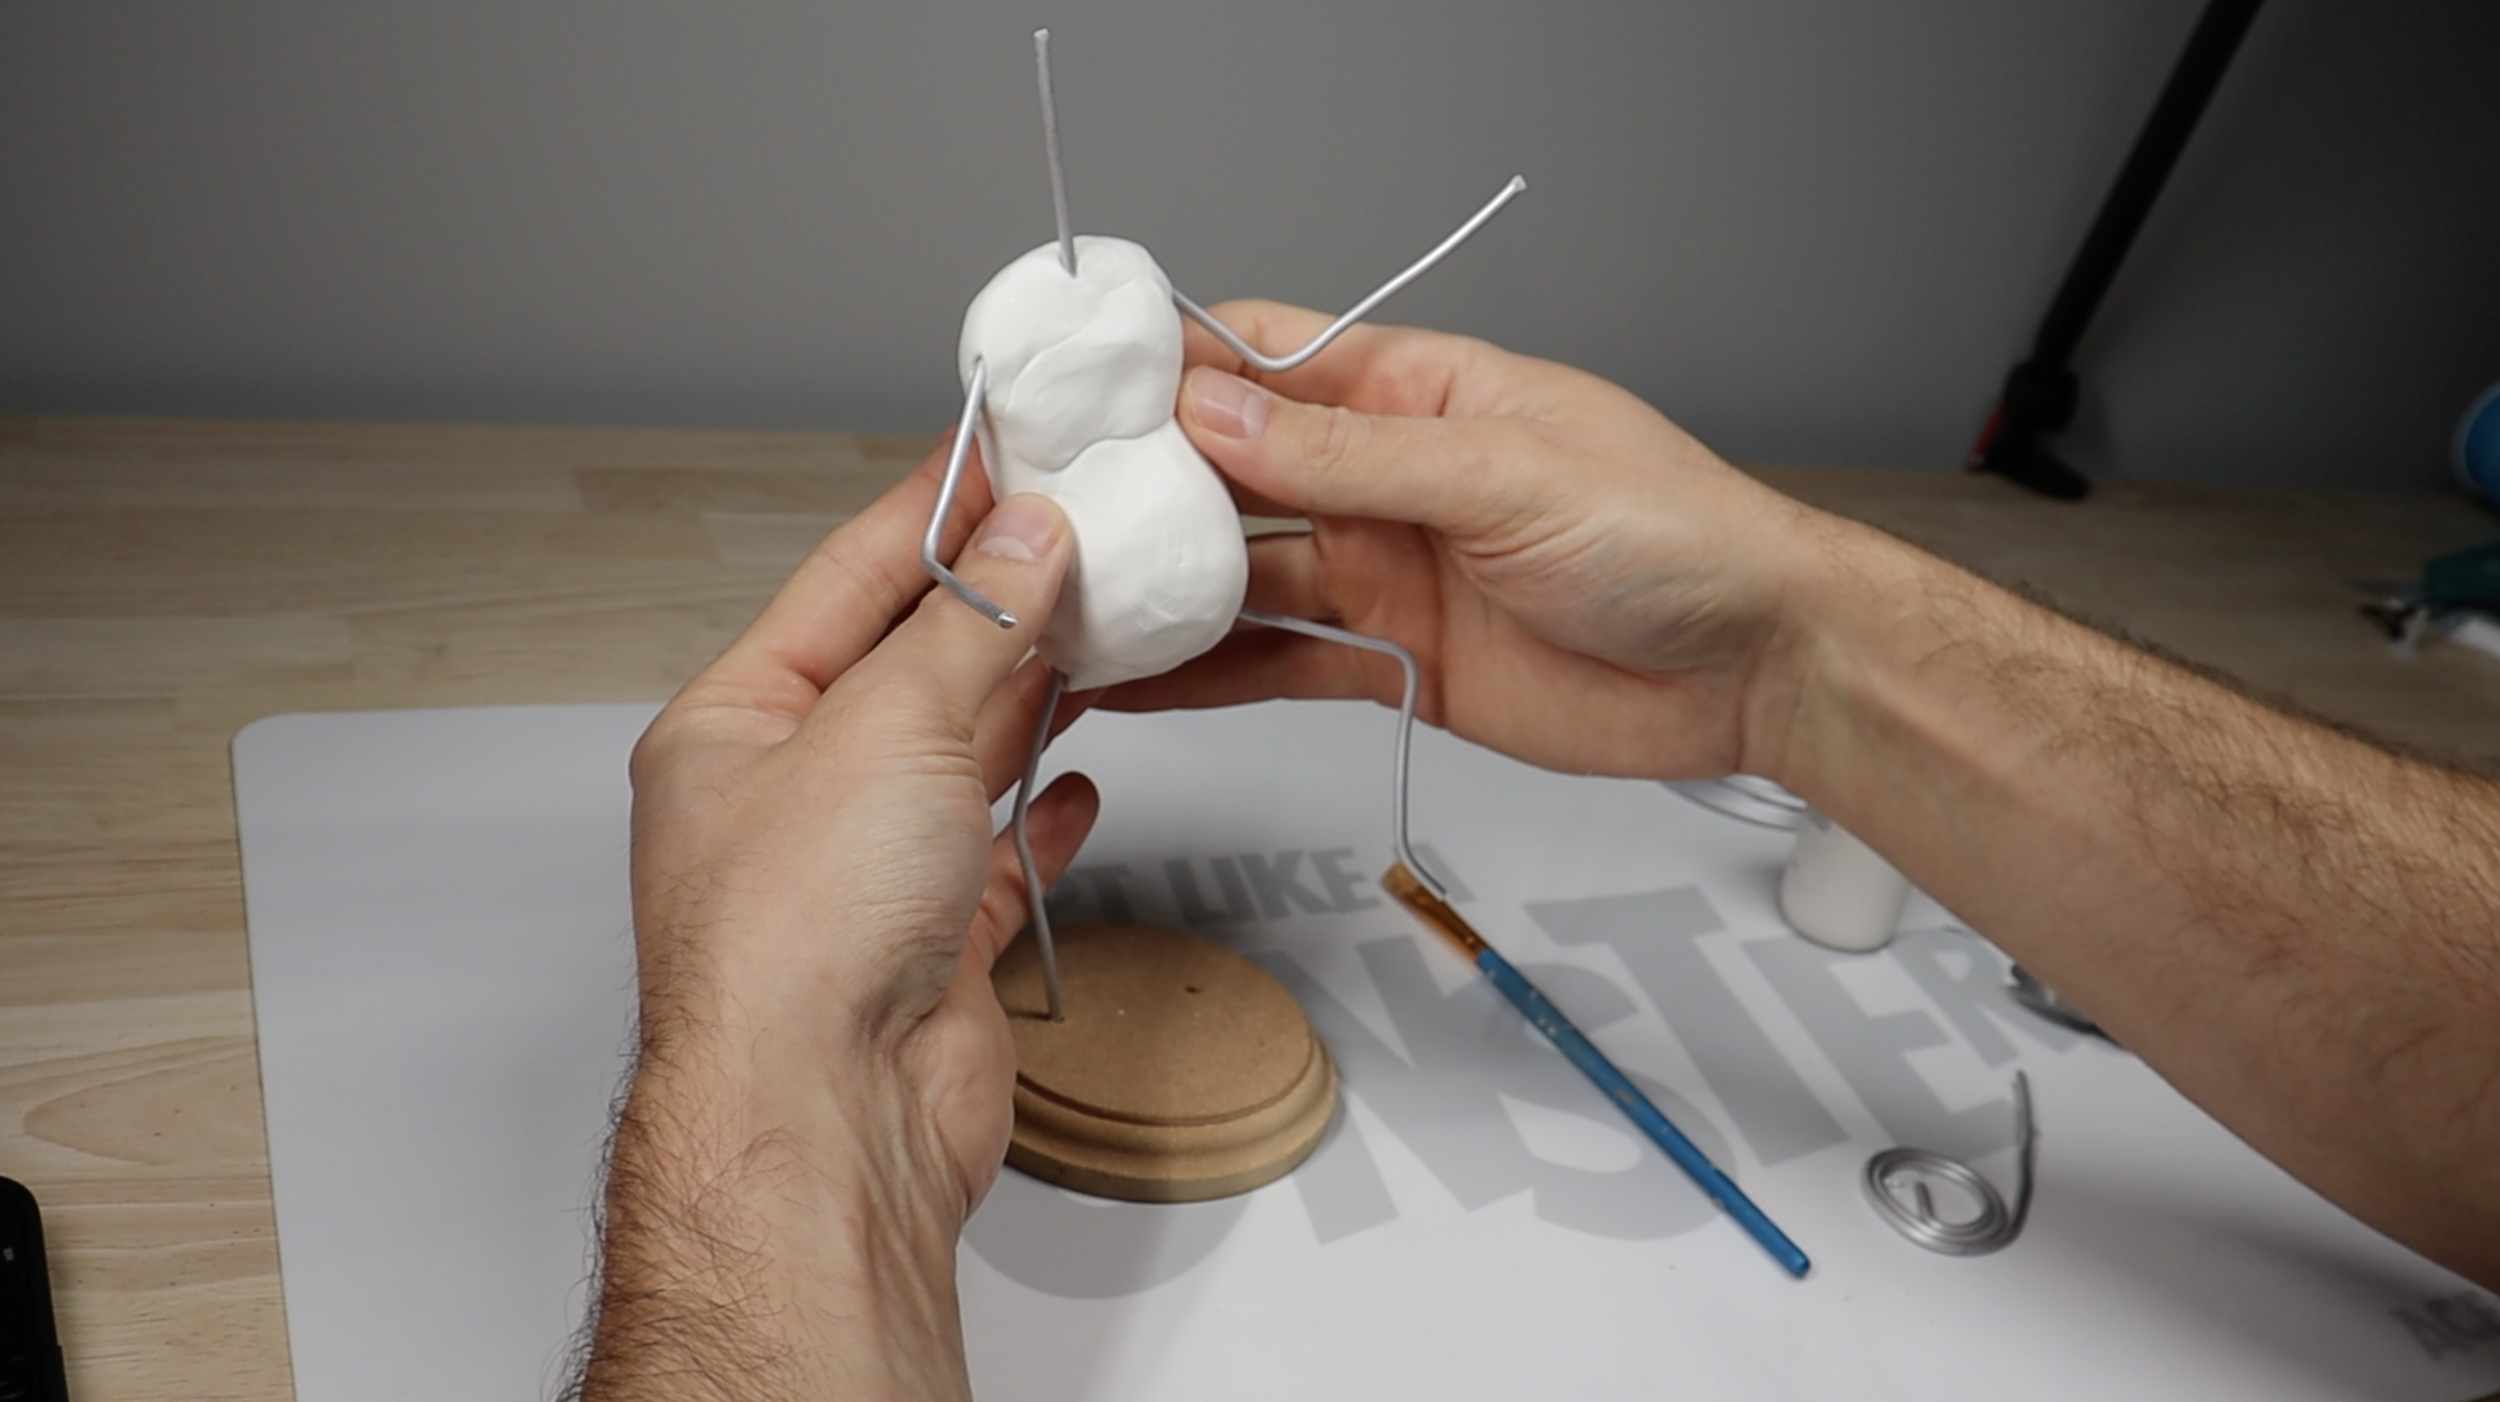
STEP 1 ARMATURE:
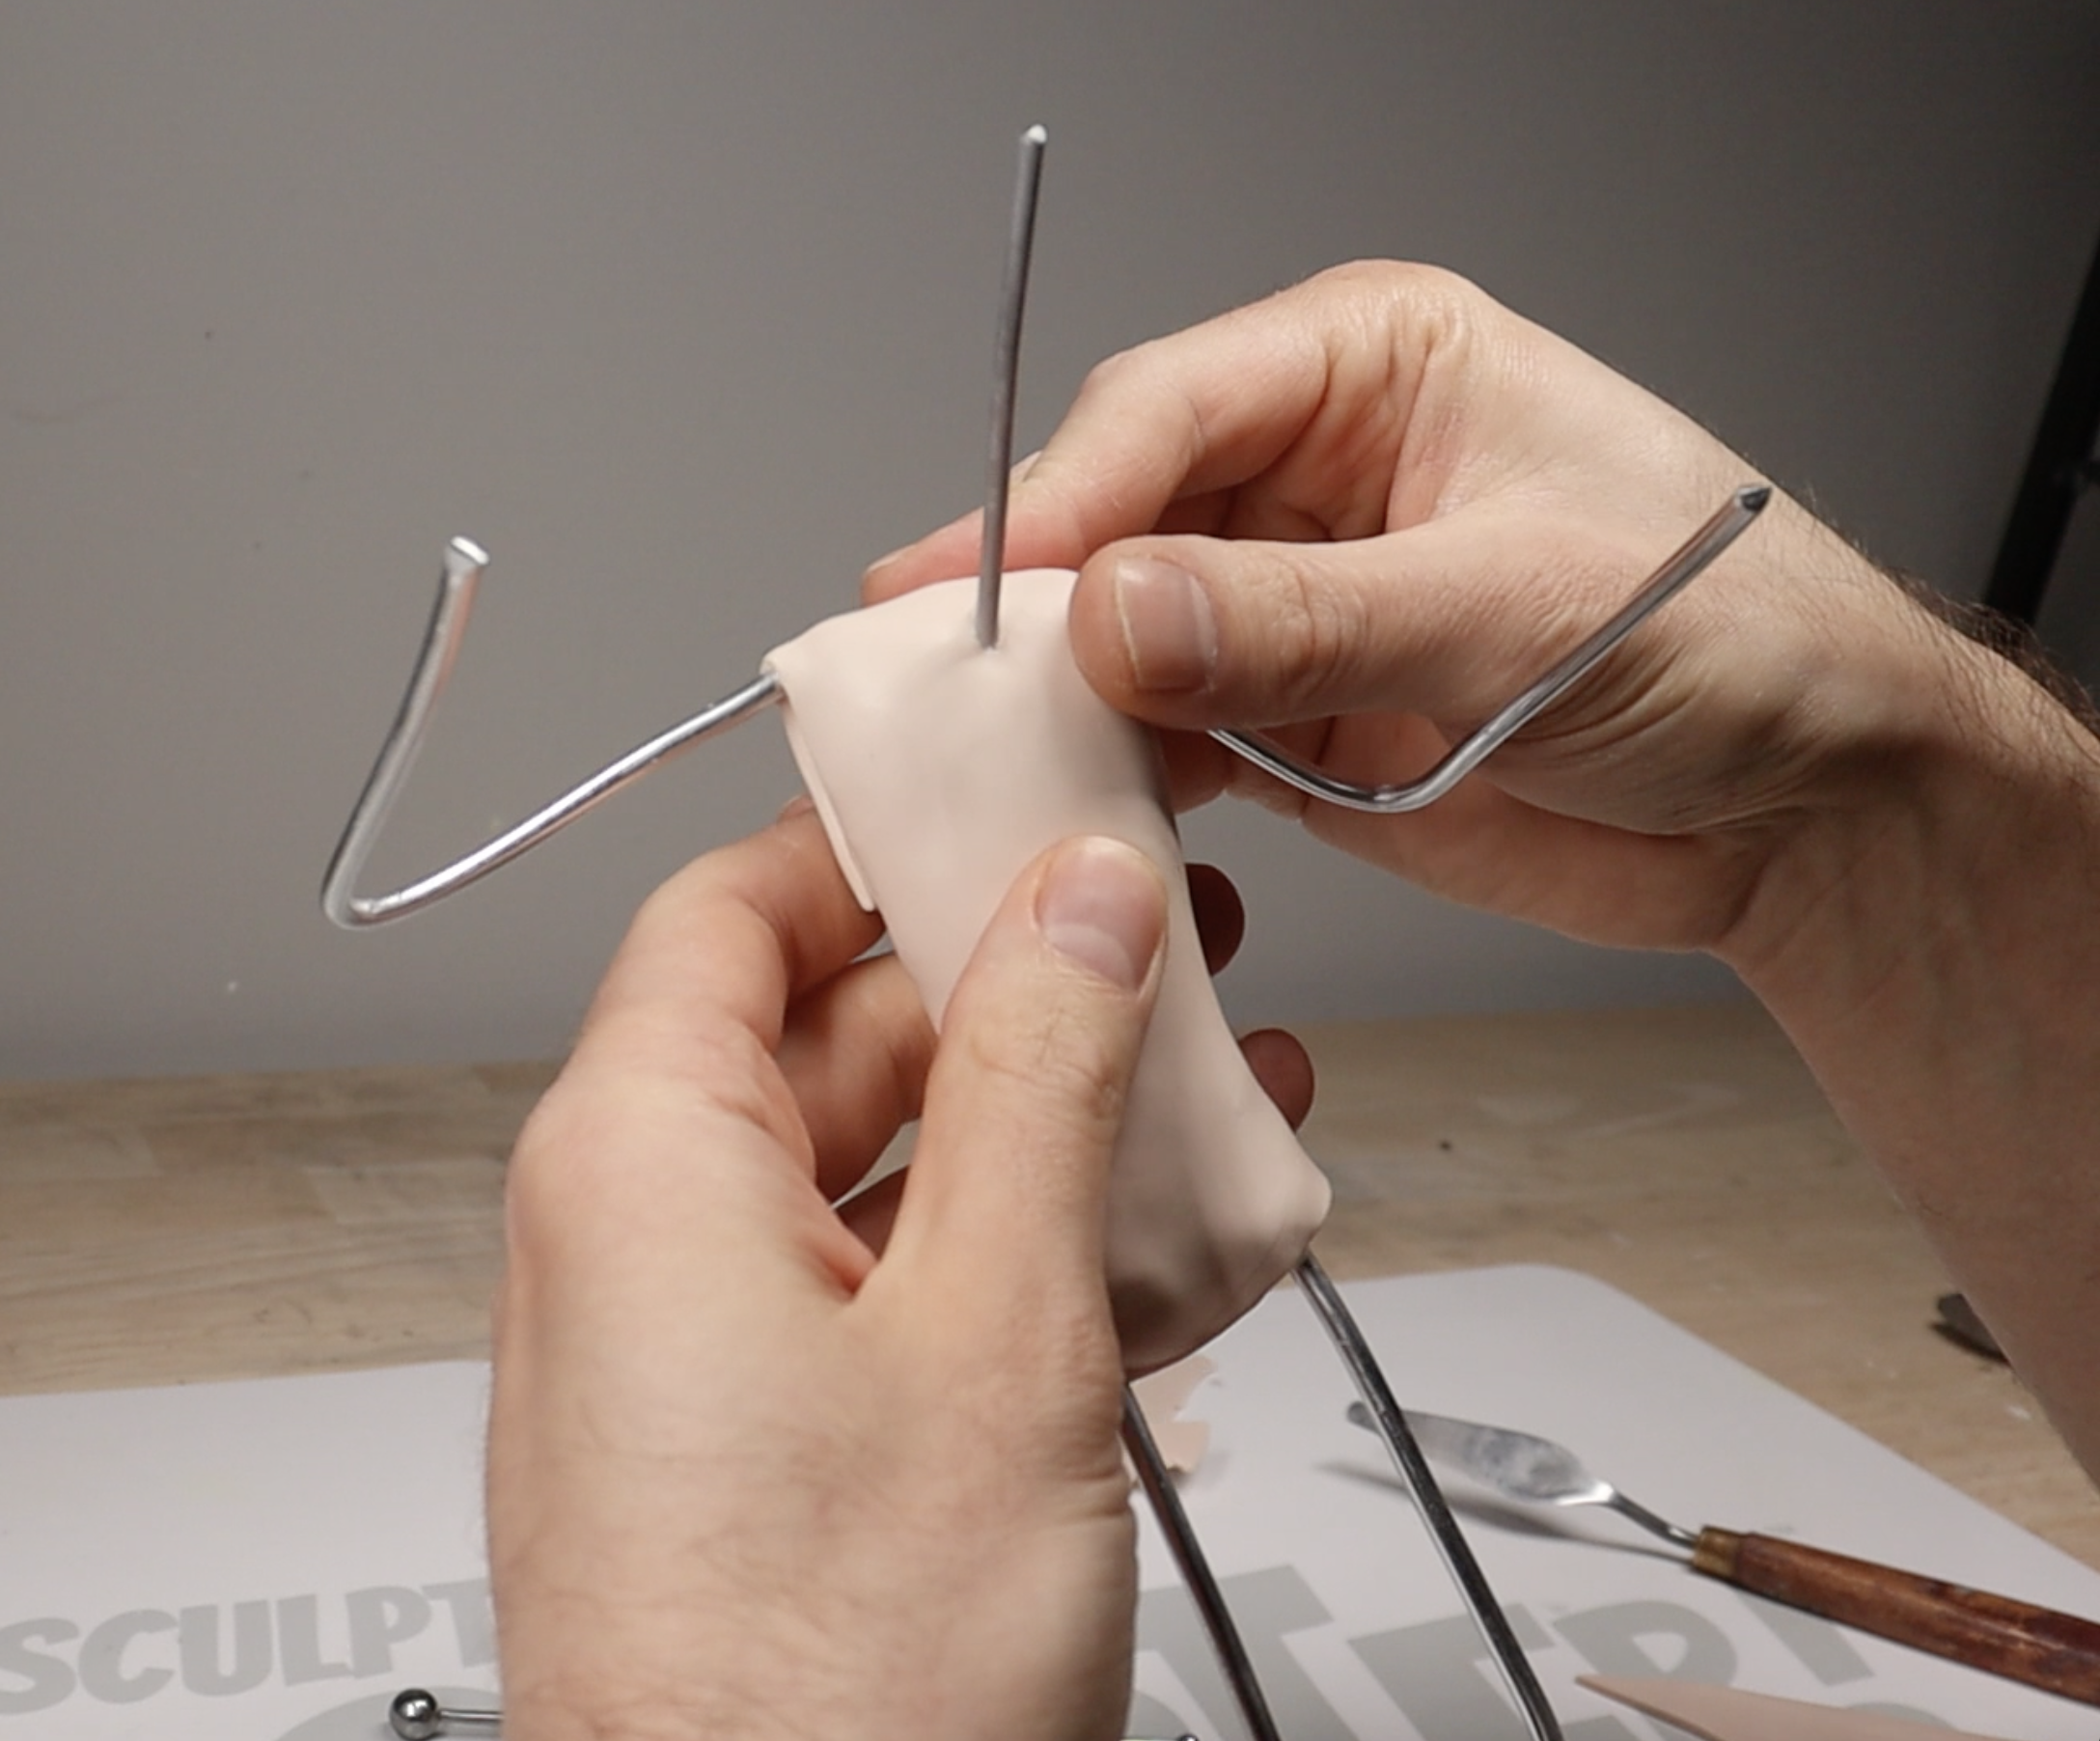
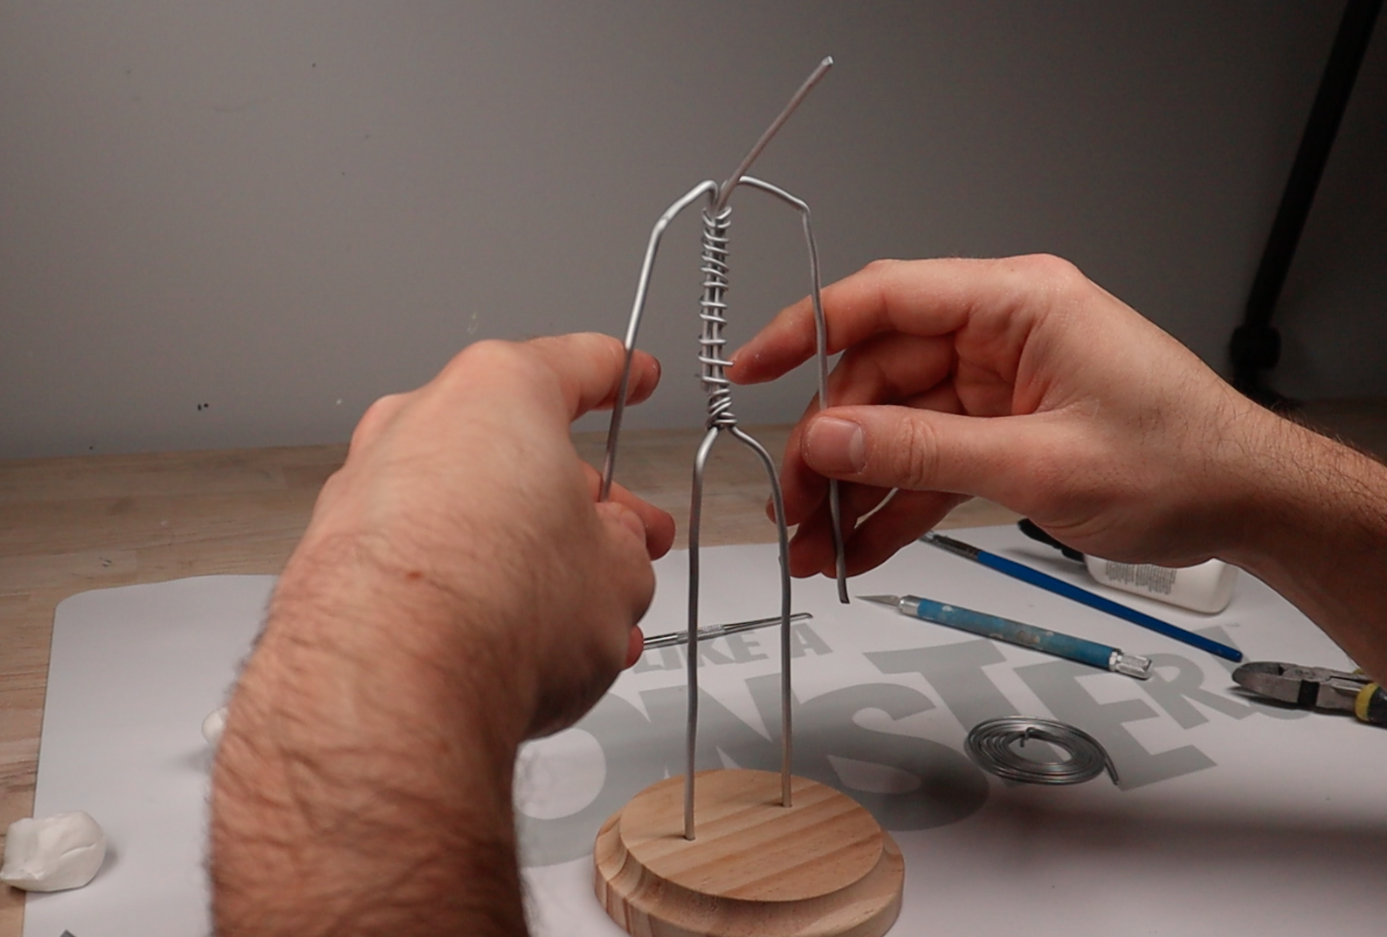
If you’re making a larger polymer clay sculpture or figurine, the first step is building an armature. An armature is basically the skeleton of your sculpture. It gives the piece structure, support, and stability while you work, and it helps the finished sculpture hold its shape over time.
Most armatures are made from metal wire, since wire is strong, flexible, and easy to shape into the basic form of your sculpture. For larger pieces, this step is especially important because polymer clay can become heavy. Without a solid armature underneath, parts of the sculpture can bend, sag, droop, or even collapse during sculpting or baking. Secure your armature to a sturdy base like our wooden sculpture bases.
A strong armature helps support the weight of the clay and gives you a reliable base to build on. It also makes it easier to figure out the pose, proportions, and overall shape before you start adding detail. In other words, if you want your sculpture to be sturdy and successful, this is not a step you want to skip. A solid armature is the foundation that everything else depends on.
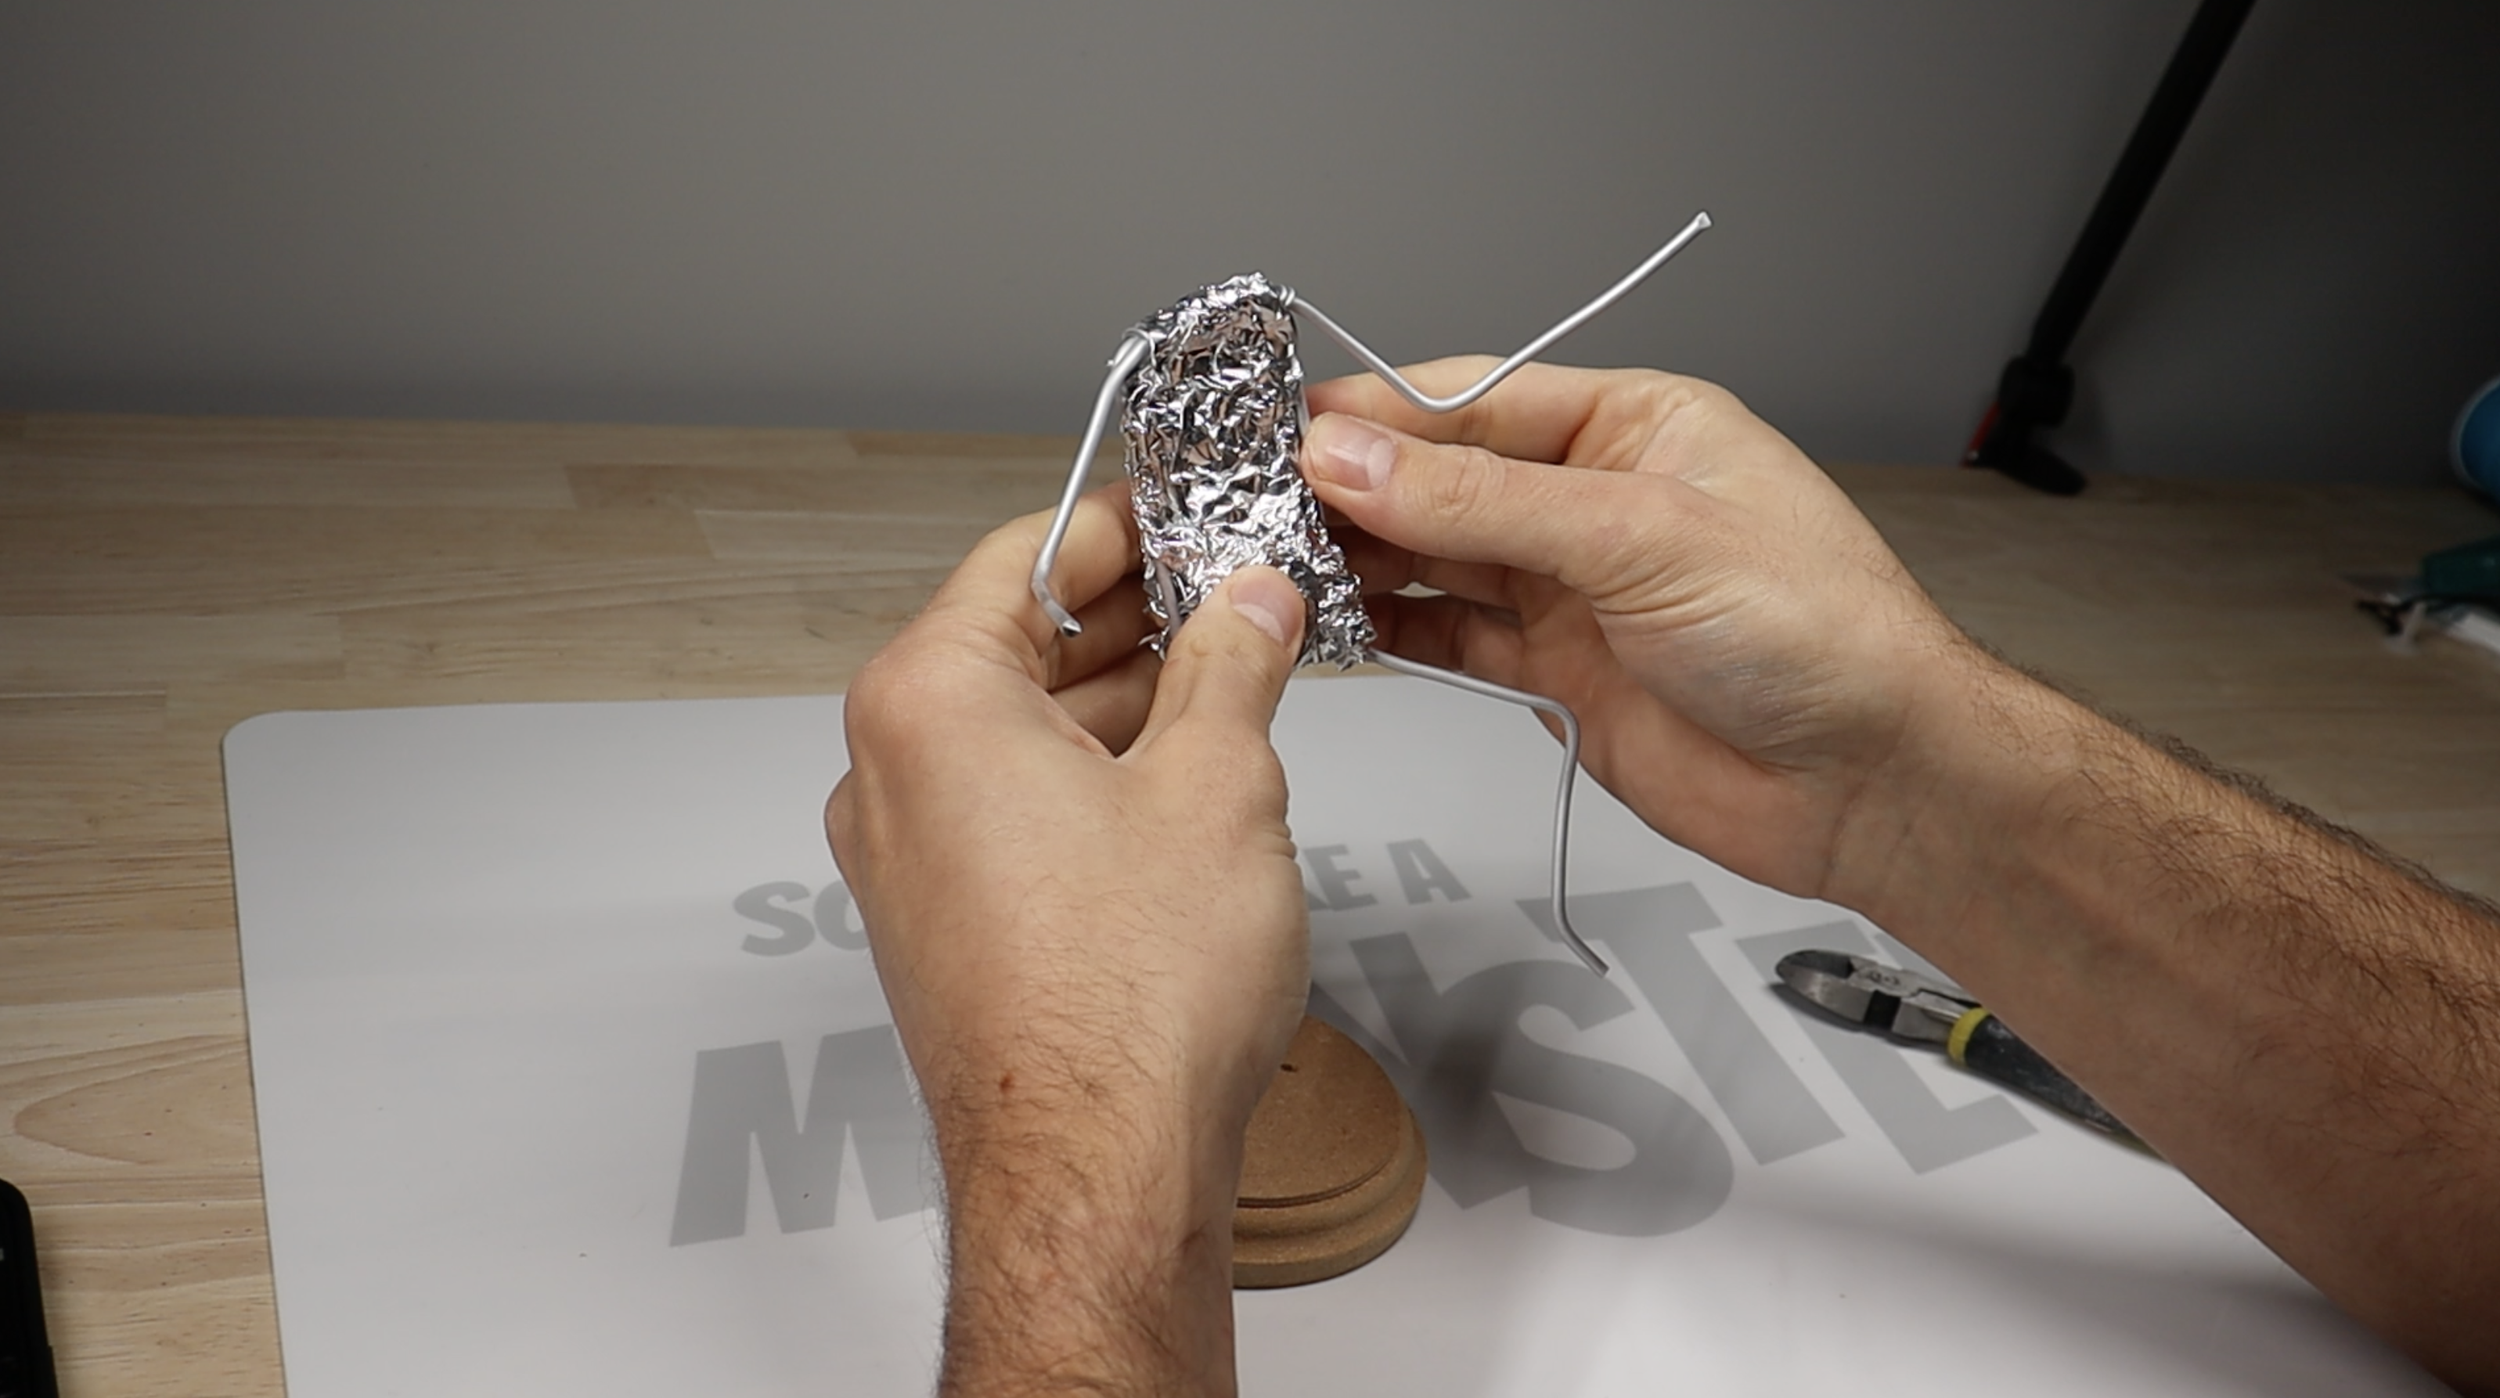
STEP 2 BULKING:
Once your armature is built, the next step is bulking out the largest areas of the sculpture. This means creating a lightweight core that fills out the basic volume of the piece before you start applying the polymer clay.
Most polymer clays aren’t designed to be applied in large, thick chunks. If you build a sculpture with solid masses of clay, the outside will bake and harden while the inside can remain under-baked or soft. This often leads to cracking, weak spots, and wasted clay. Since polymer clay isn’t exactly cheap, using large amounts where you don’t need to can get expensive quickly.
Bulking solves this problem by filling the inside of the sculpture with a lightweight material that takes up space. Instead of using clay for the entire volume, you create a core and then apply a thinner layer of polymer clay over the outside. This allows the sculpture to bake more evenly and keeps the overall weight down.
Two of the most common materials used for bulking are aluminum foil and lightweight bulk clays like Sculpey Ultralight. Aluminum foil is inexpensive, easy to find, and can be compressed and shaped almost like clay to build the basic forms of your sculpture. Ultralight clay works in a similar way and is designed to not crack when applied in thick blocks.
Whichever material you use, the goal is the same: build up the general shape and size of the sculpture first. Once the core is in place, you can begin applying a thinner outer layer of polymer clay. This outer layer is what you’ll actually sculpt, refine, and add details to, while the bulk material inside simply gives the sculpture its size and structure.
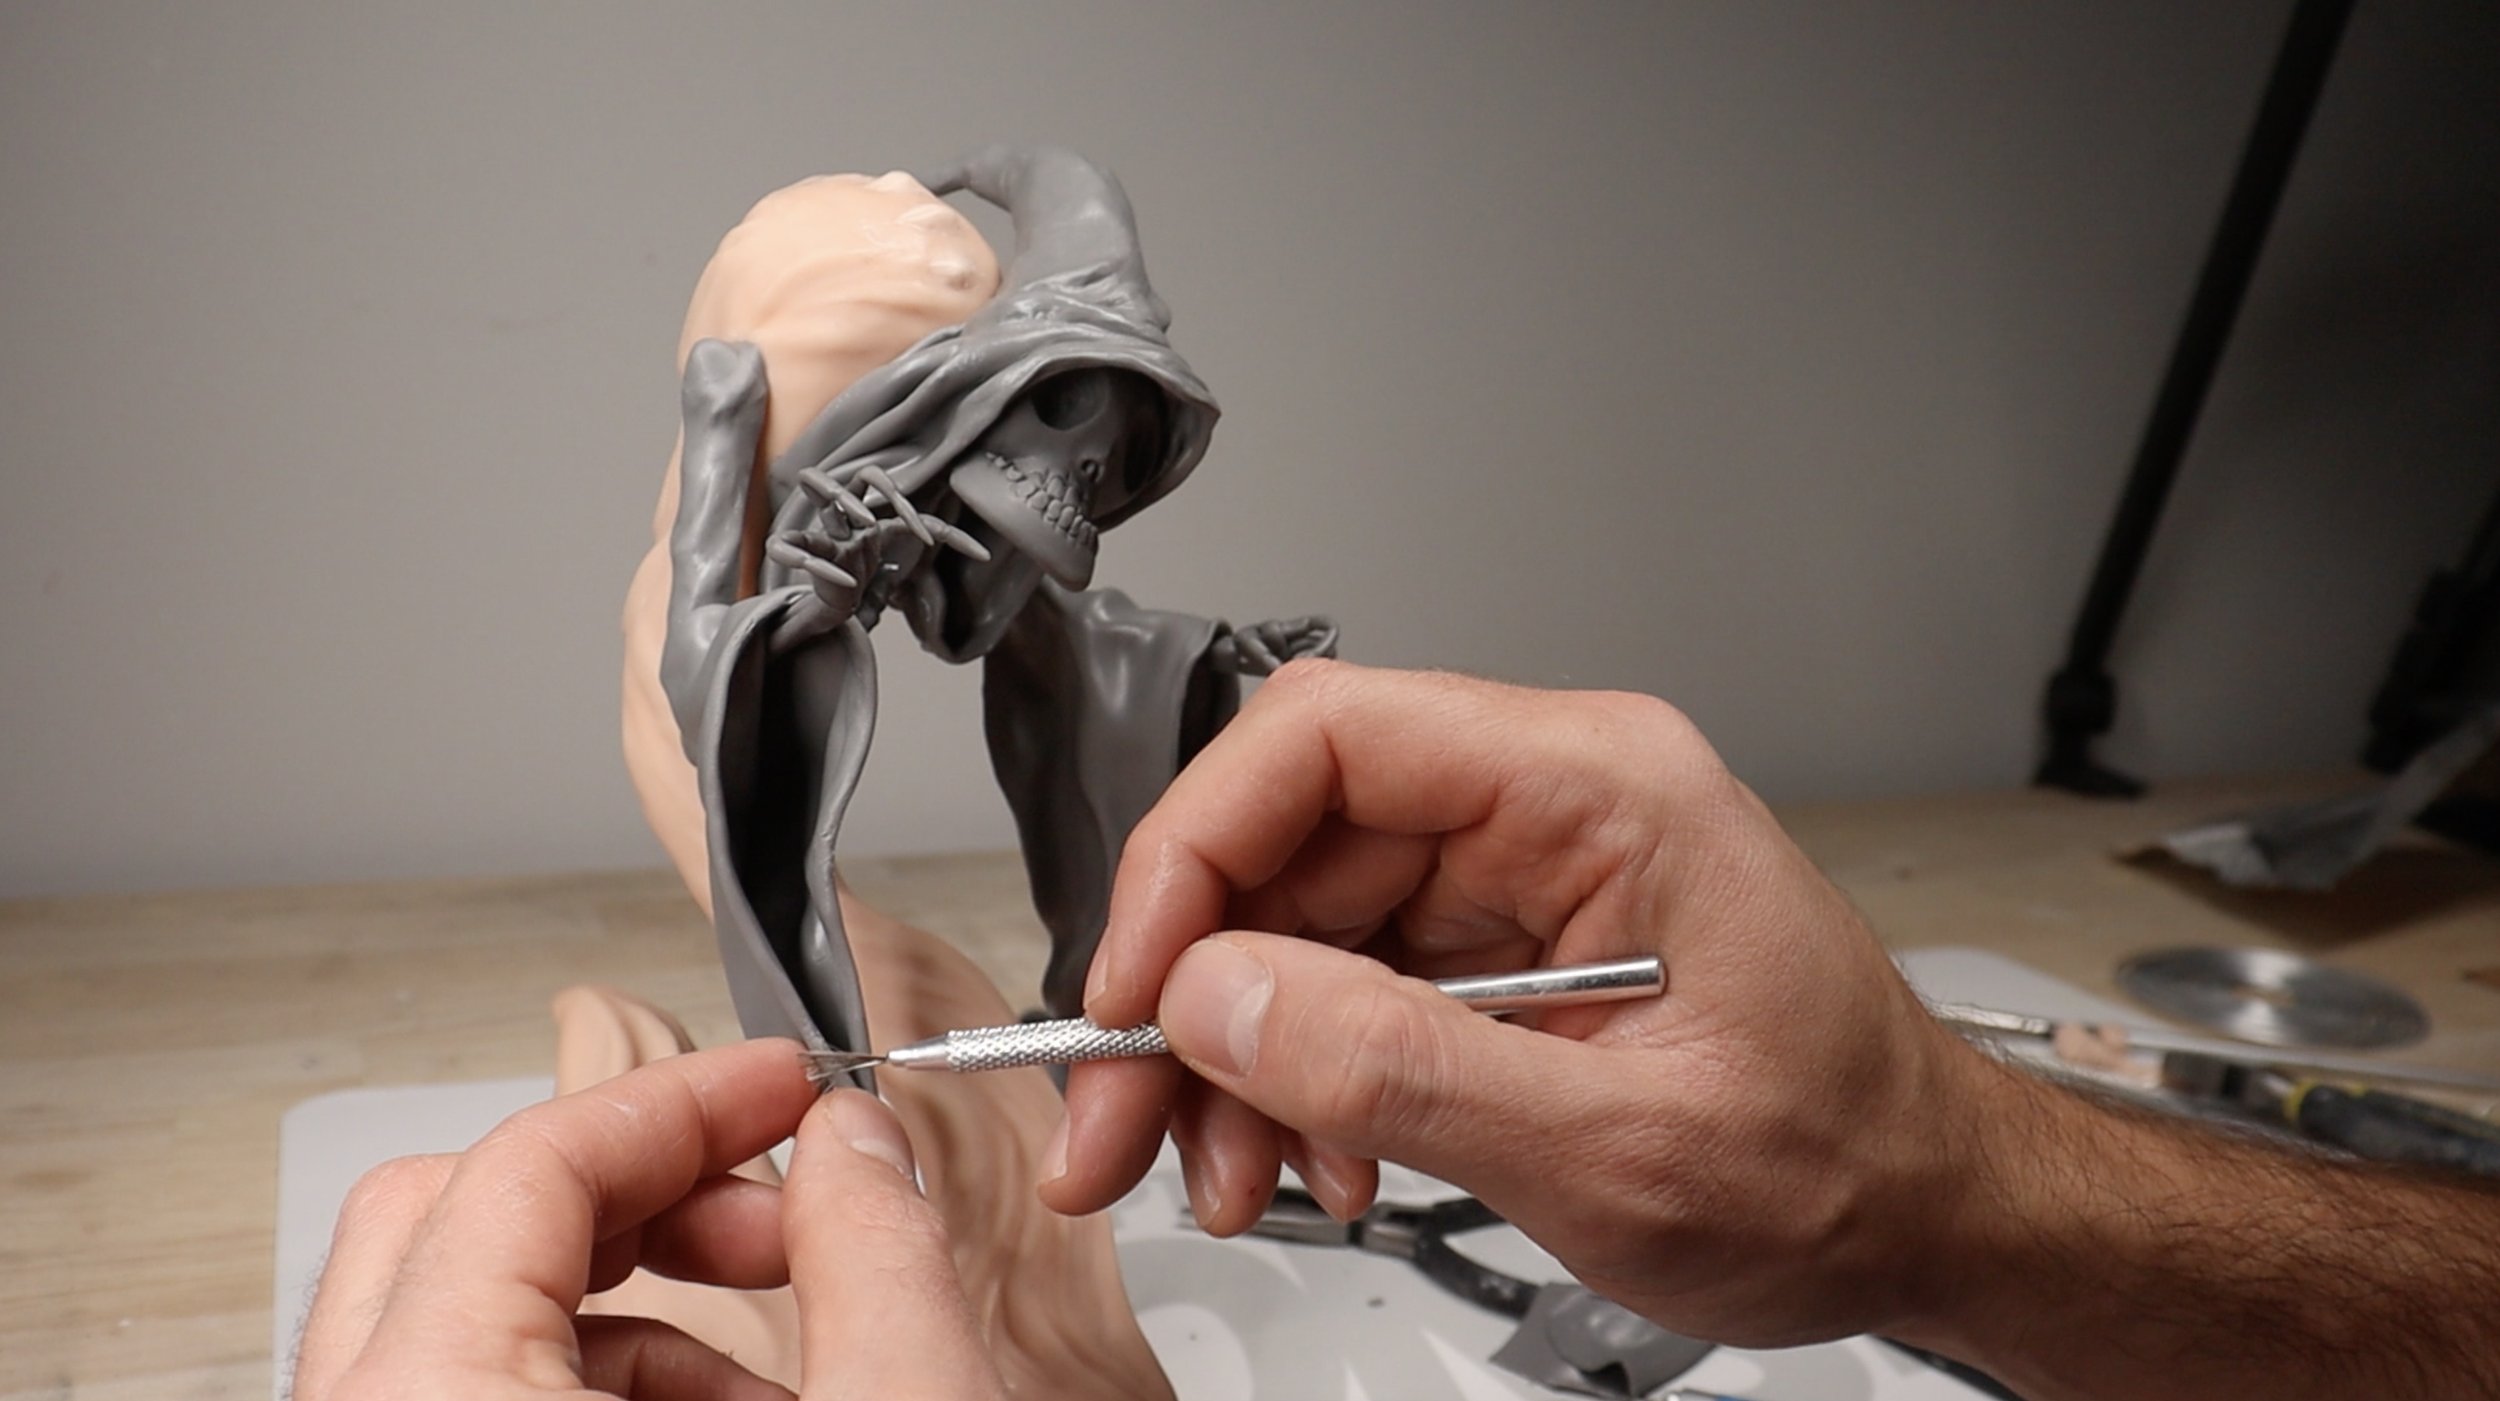
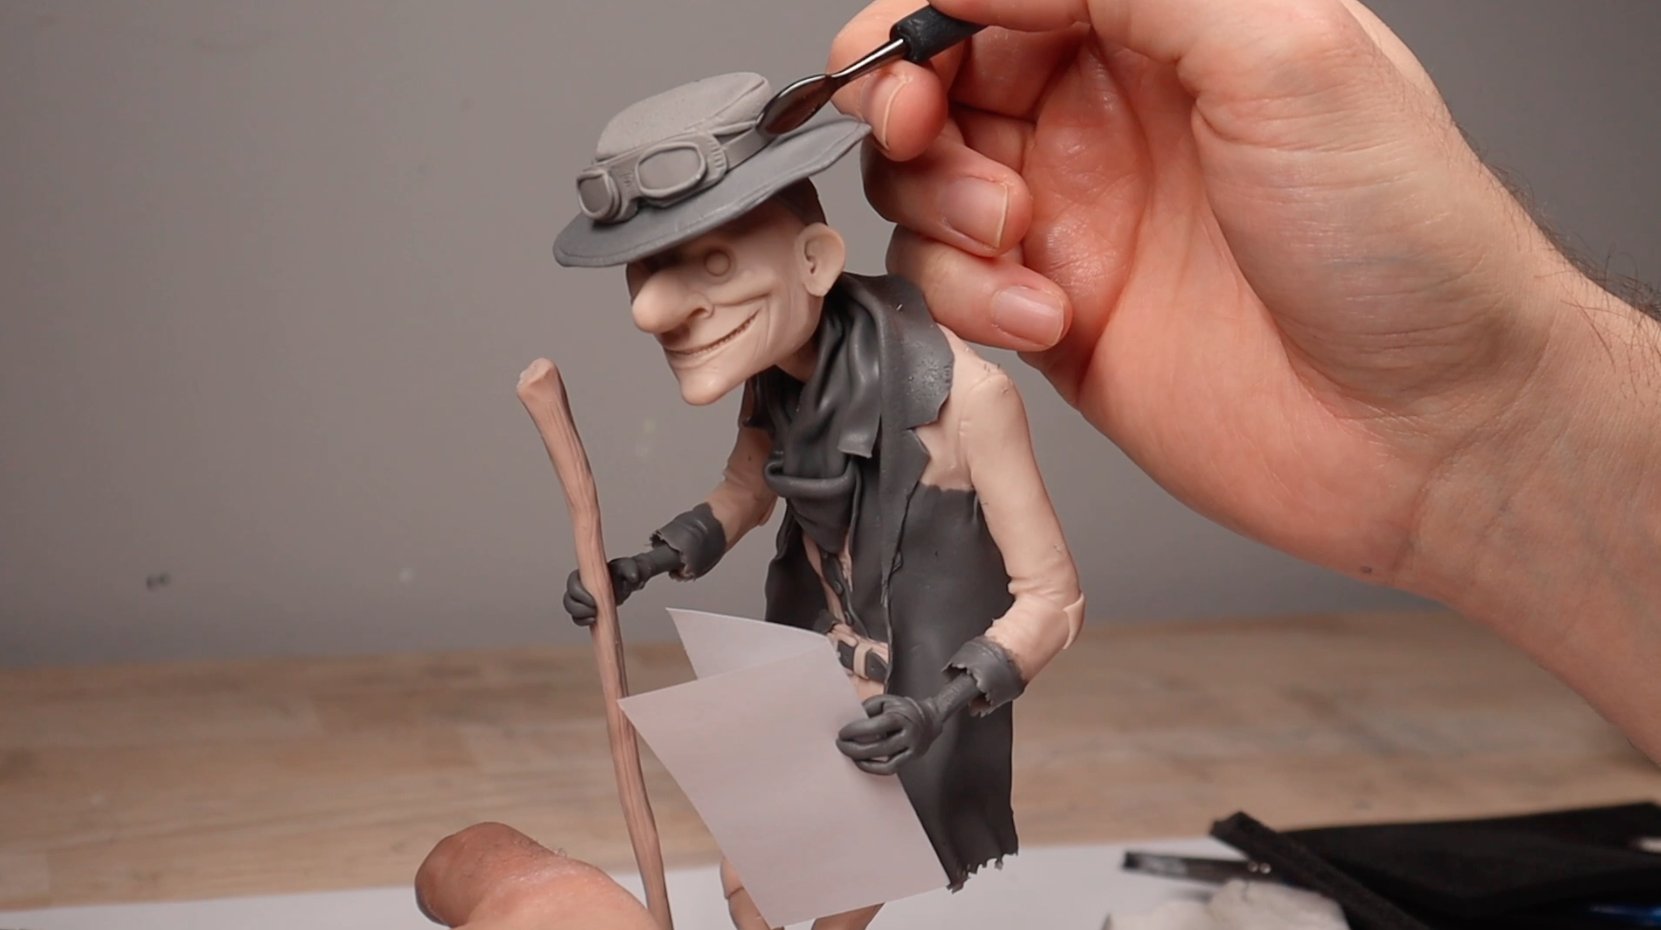
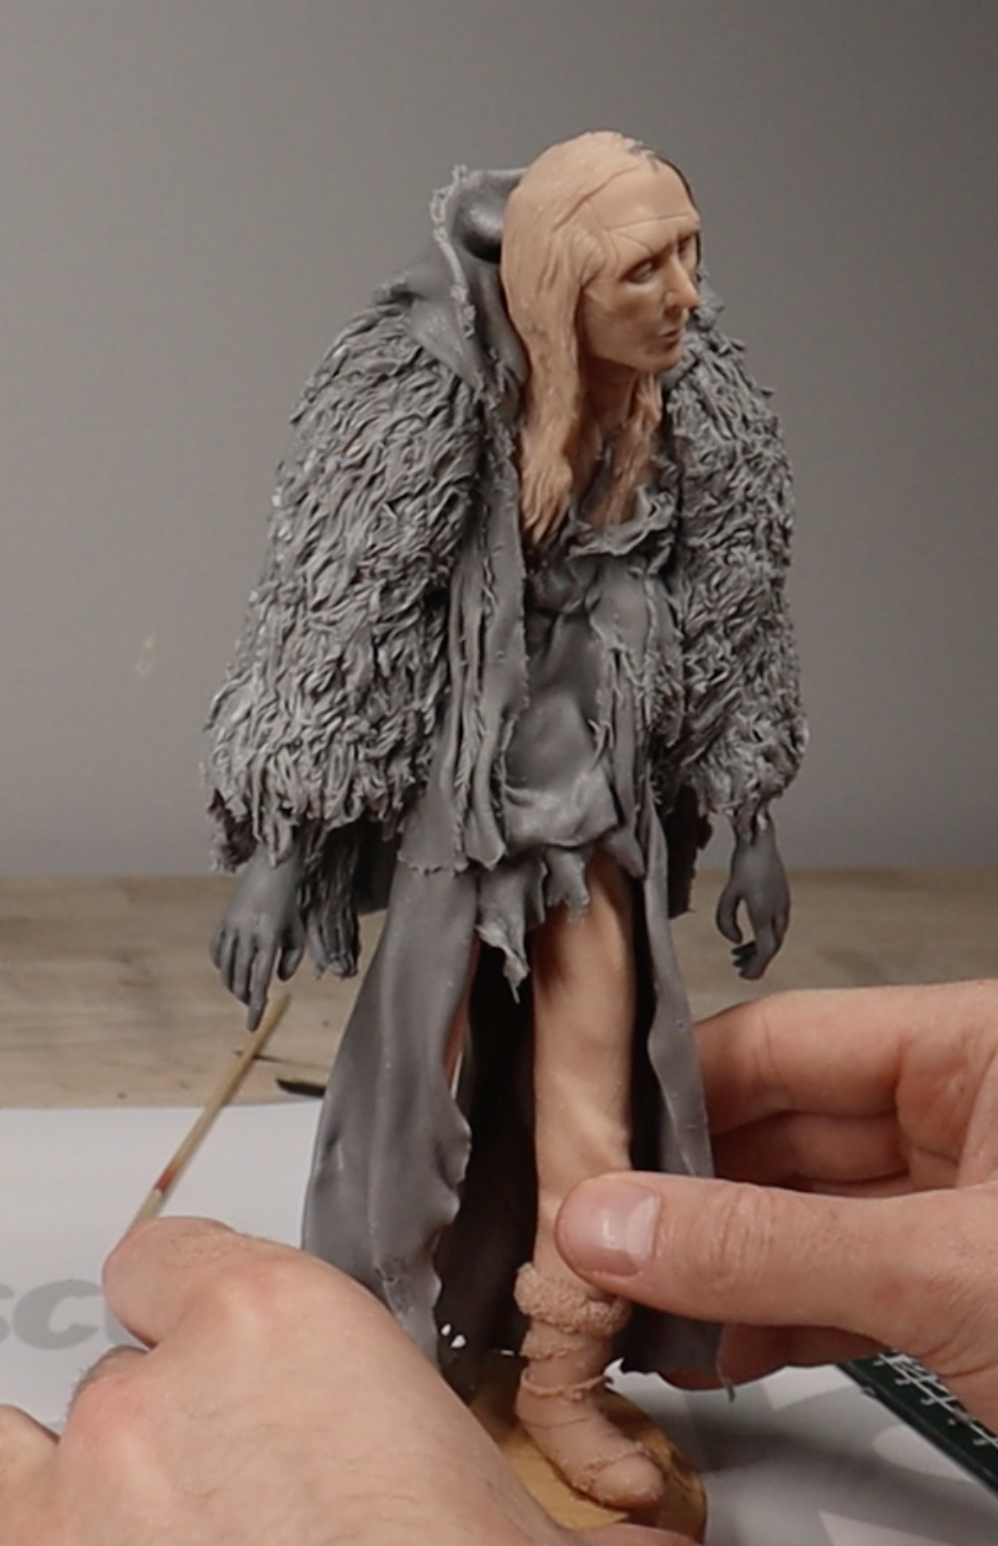
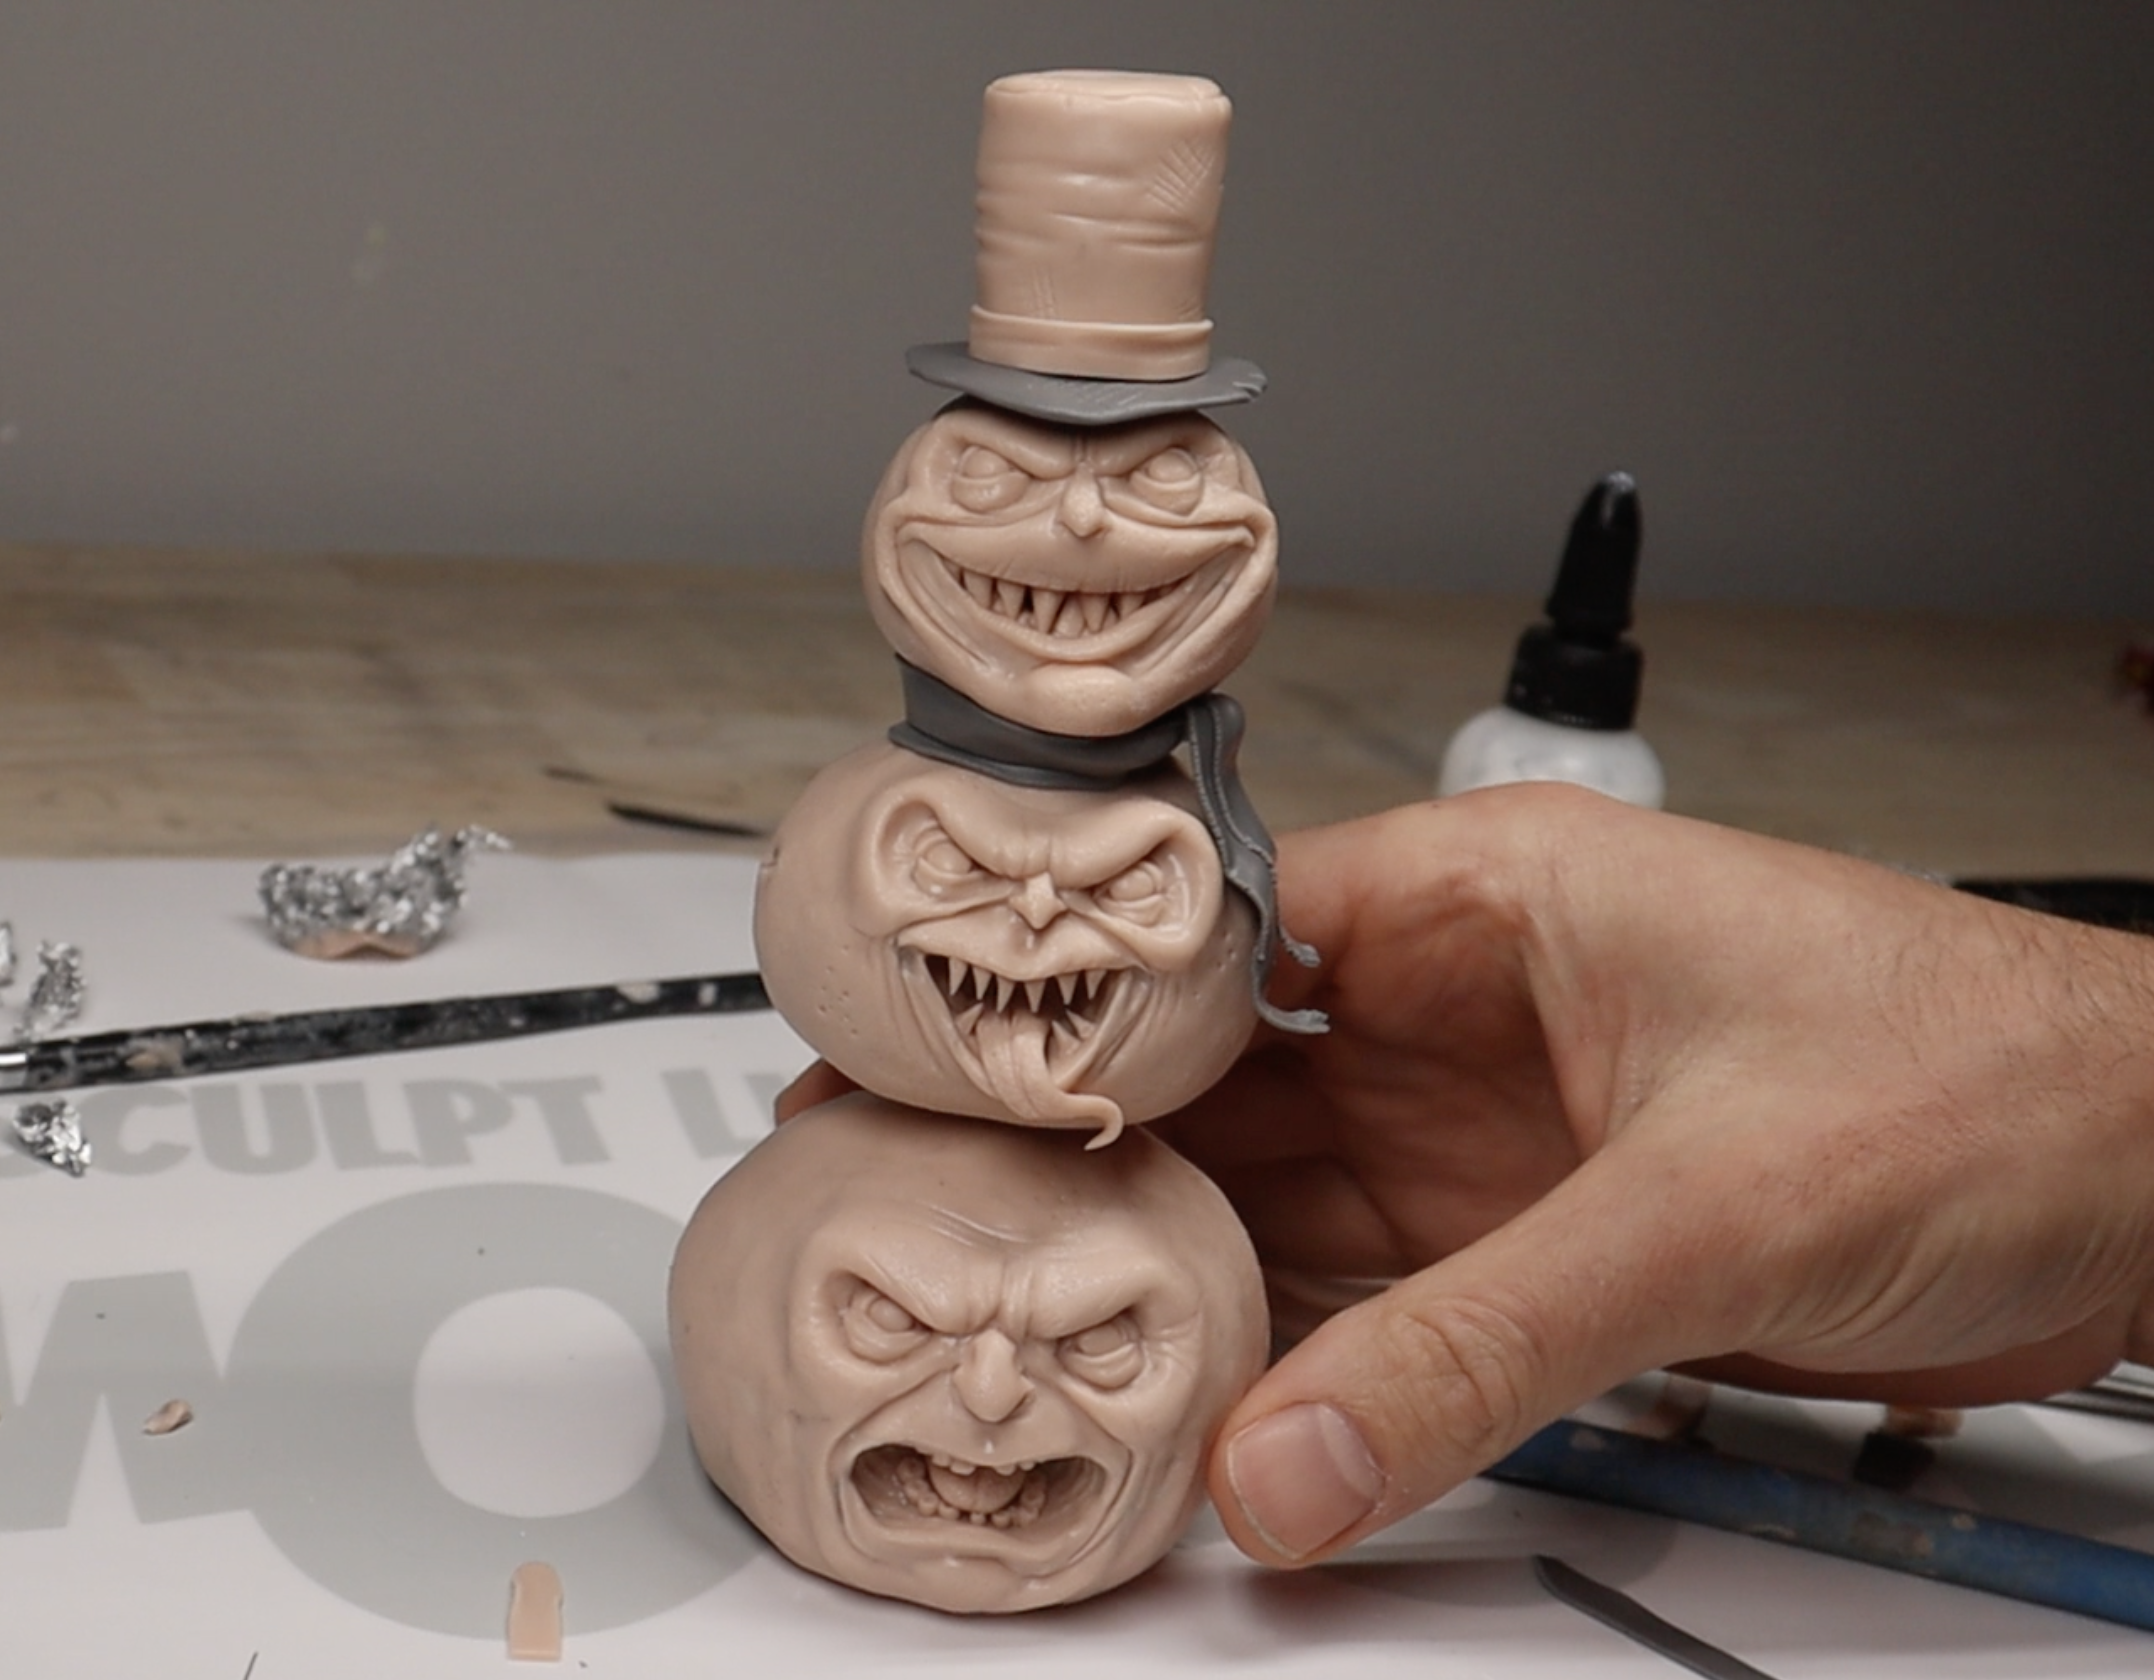
STEP 3 SCULPTING:
Once your armature and bulk are finished, it’s time to apply your final layer of polymer clay and begin sculpting. This is where the sculpture really starts to come to life.
Apply a thinner outer layer of clay over your bulked core and begin shaping the main forms of the sculpture. From there, you can start refining the piece by adding details, smoothing surfaces, carving textures, and building up smaller elements. This is usually the most enjoyable part of the process because you’re finally moving from a rough structure into the finished look of the sculpture.
As you work, it’s important to make sure you’re pressing the clay firmly against the surface underneath so you don’t trap air pockets beneath the clay. Air trapped under the surface can expand during baking and sometimes cause bubbling or cracks.
A helpful professional tip is to pre-bake your sculpture in stages as you complete different sections. Polymer clay can be baked multiple times without any problems, so fully baking finished areas helps lock in your progress. This prevents you from accidentally squishing or damaging details while you continue working on other parts of the sculpture.
By working in layers and baking sections as you go, you can build up complex sculptures piece by piece while keeping all of your hard work safe.
STEP 4 BAKING:
Once your sculpting is complete, the next step is baking the sculpture to cure the polymer clay. Polymer clay hardens when it is baked in a regular home oven, turning the soft clay into a durable, plastic-like material that permanently holds all the details you sculpted.
Always bake your sculpture according to the instructions provided by the clay manufacturer. Different brands of polymer clay have slightly different recommended temperatures and baking times. In most cases polymer clay is baked somewhere around 265 to 275°F, and typical baking times range from about 20 to 45 minutes depending on the thickness of the clay.
It is important not to increase the oven temperature beyond what the manufacturer recommends. Higher temperatures will not bake the clay faster. Instead they can cause the clay to burn, darken, or release unpleasant fumes. Following the recommended temperature ensures the clay cures properly without damaging your sculpture.
For baking, place your sculpture on a sturdy baking sheet or inside a glass casserole dish so it has a stable surface while curing. This can be done right in your regular kitchen oven. No special equipment is required.
Make sure your sculpture is evenly spaced in the oven and not placed too close to the heating elements. Keeping some distance from the top or bottom heating elements helps prevent scorching or uneven baking.
Once the baking time is complete, remove the sculpture from the oven and allow it to cool fully before handling it. As the clay cools, it will finish hardening and become strong enough for sanding, painting, or other finishing steps if needed.
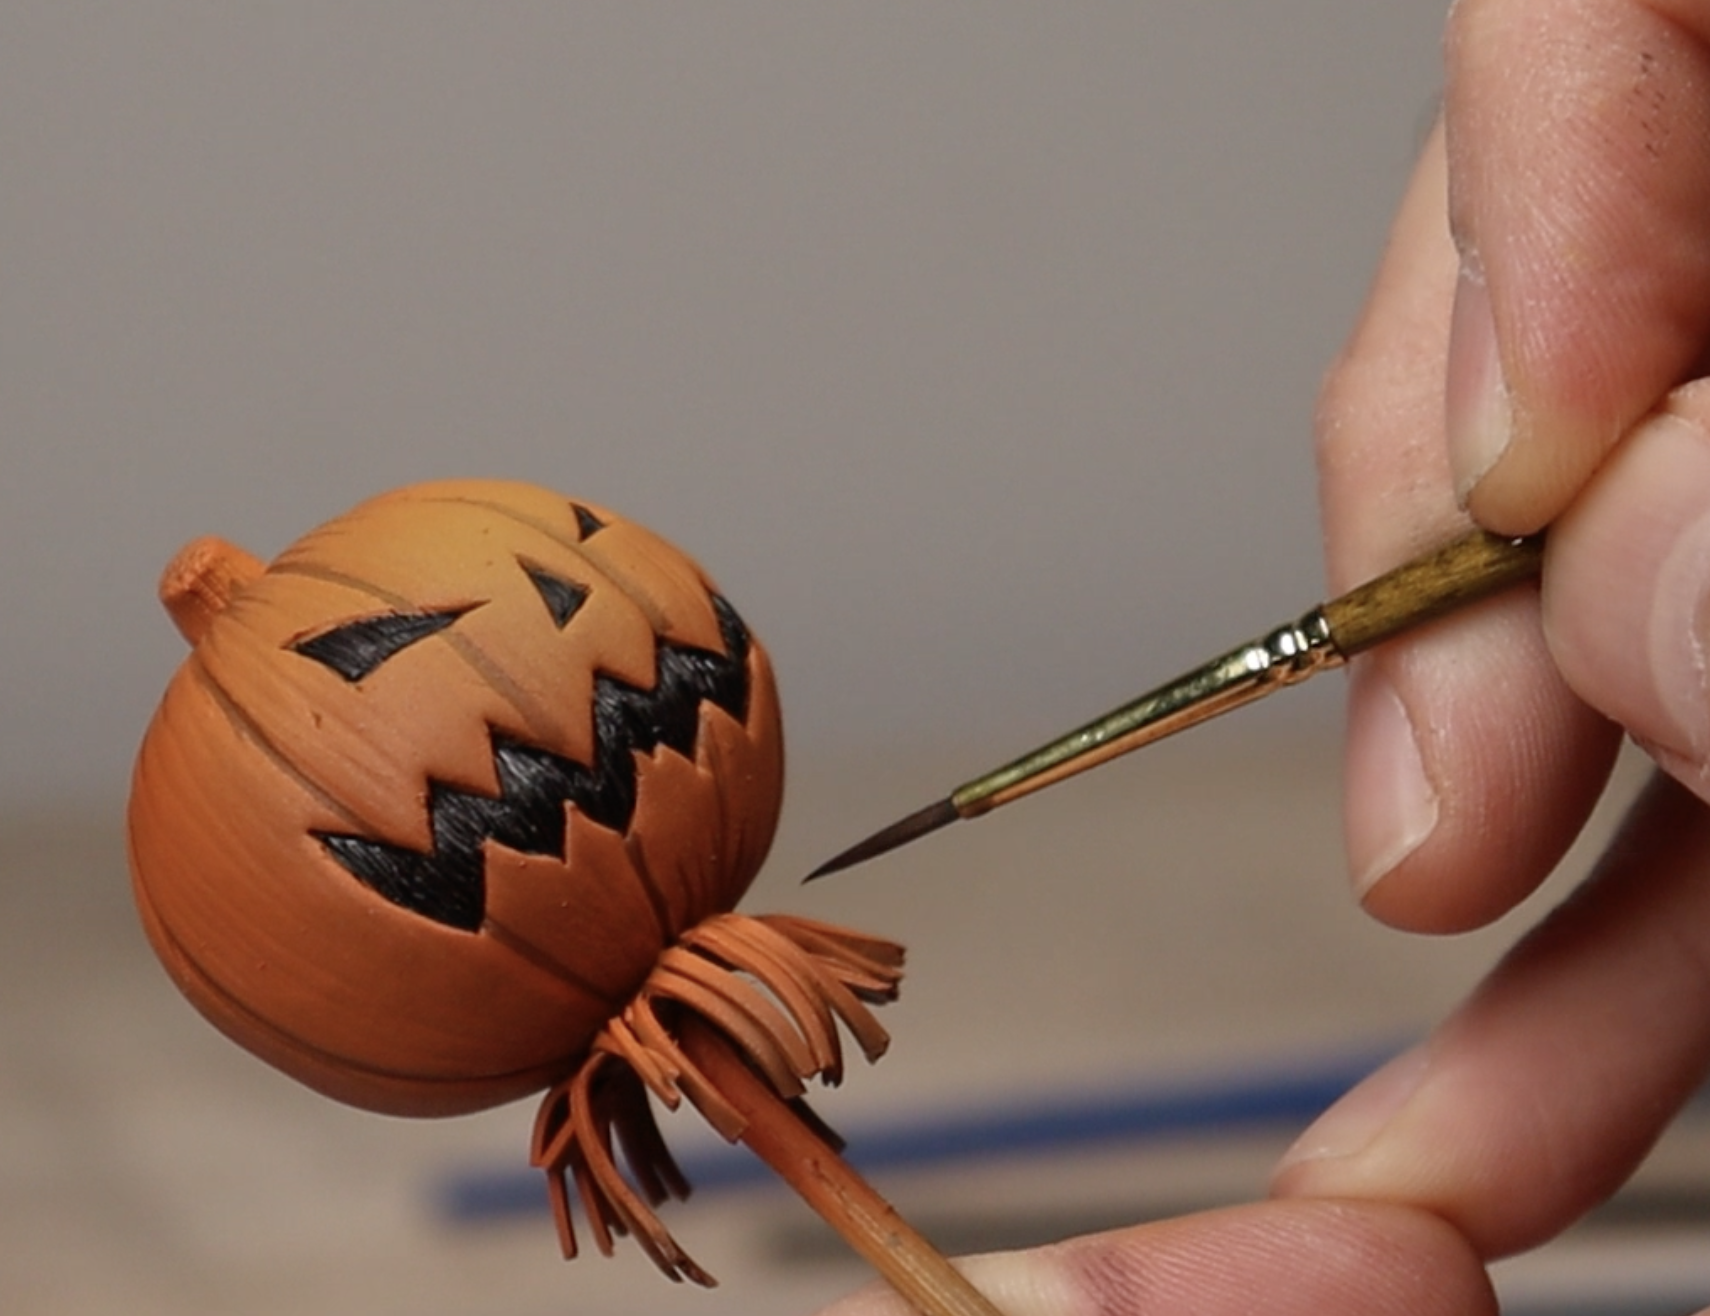
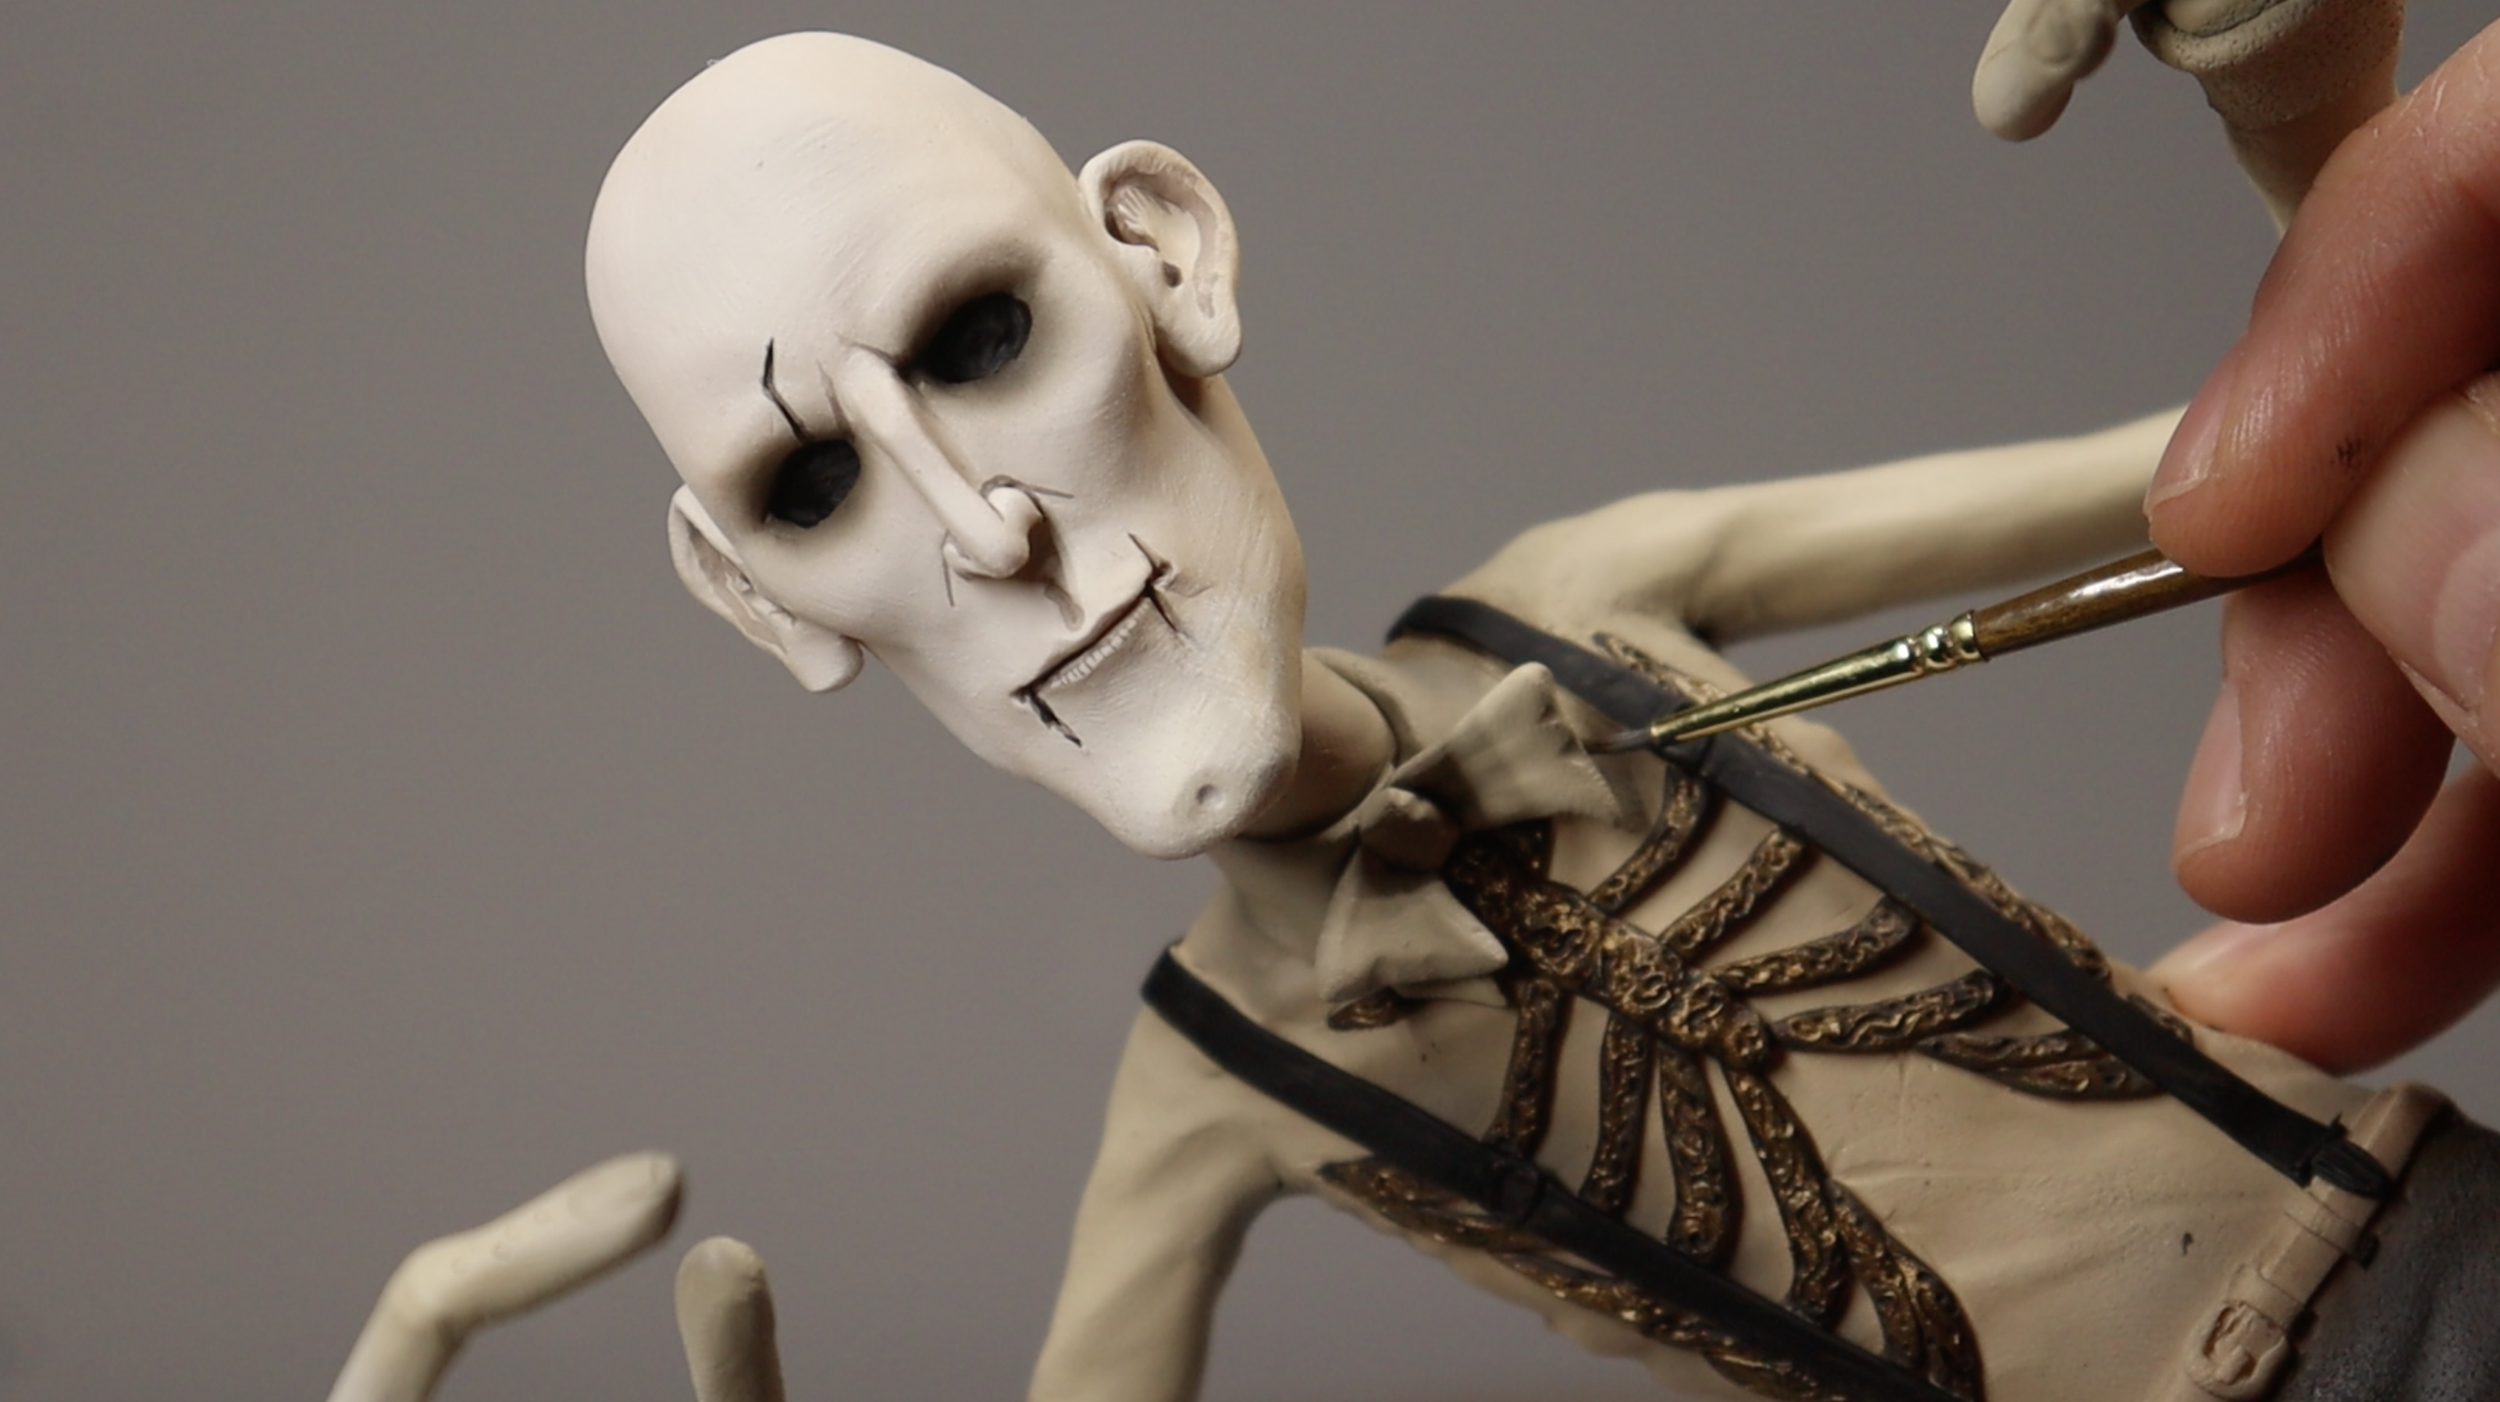
STEP 5 PAINTING & FINISHING:
After baking, most polymer clays can be sanded, drilled, carved, or refined further if needed. This is the stage where you can clean up small imperfections and prepare the sculpture for paint. Light sanding can smooth surfaces, and small holes can be drilled if you need to attach additional parts or accessories.
Once the surface is ready, you can begin painting your sculpture. Water-based acrylic paints work best for polymer clay and are widely used by artists. The good news is that you do not need expensive paints. Cheap craft store acrylics work perfectly fine for most sculptures.
There are many different ways to paint a polymer clay sculpture. Some artists prefer airbrushing for smooth gradients and shading. Others hand paint with small brushes to add precise details. You can also use sponges for texture, dry brushing for highlights, or even finger painting for certain effects. The method you use simply depends on the look you want and the type of sculpture you are creating. Check out my full tutorial on sculpture painting here.
When the painting is finished, you may choose to seal the sculpture. Polymer clay itself does not require varnish, but the paint you use might benefit from a protective finish. If you decide to seal your sculpture, brush-on varnishes tend to work best.
It is generally best to avoid aerosol sprays and products like Mod Podge when sealing polymer clay sculptures. Many of these finishes can remain sticky on polymer clay surfaces and never fully cure, which can ruin the final piece. Using a quality brush-on varnish will give you a much more durable finish.
And you’re done!
And that’s it. You’ve officially made a sculpture.
Take a second and pat yourself on the back. Turning a block of clay into something real is no small thing. Whether it’s your first sculpture or your hundredth, there’s something satisfying about seeing an idea in your head become a physical object you can hold in your hands.
Now it’s time to enjoy it. Display it on a shelf, add it to your collection, gift it to someone, or use it as inspiration for your next sculpture. Every piece you make helps you get better, learn new techniques, and push your skills further.
The most important thing is to keep creating. The more you sculpt, the more confident and creative you’ll become. So enjoy the finished piece, then grab some clay and start the next one.